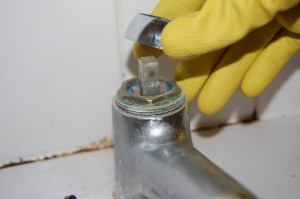
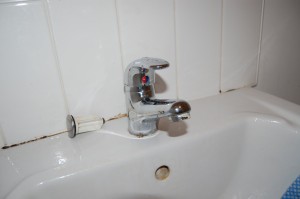
The tap in my bathroom sink had been getting rather "sticky" of late. I don't mean sticky to the touch on the exterior, but as a mixer tap its vertical movements were no longer smooth and thus controlling water flow had become difficult. This condition had been deteriorating over the last year or so, and I decided that now would be a great time to do something about it.
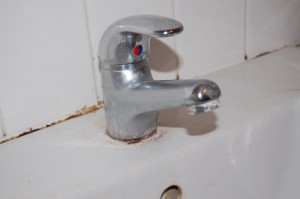
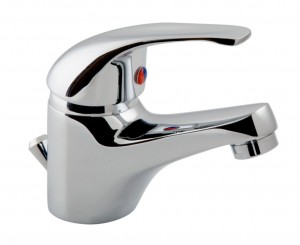
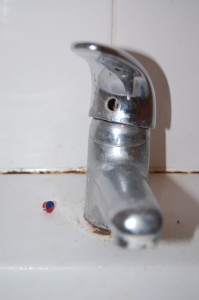
I rent an apartment and have little to no documentation of the major fittings, though there is a pack of assembly instructions for a few furnishings hidden away at the back of one of the kitchen draws, enough to identify my tap as a "Mixer Tap with Pop-up Waste" from Bristan's "Matrix" range.
(Apparently the unit is also sold under the Vado name, and pop-up waste means that there is a push/pull lever at the rear of the assembly for raising and lowering the plug.)
The web contains a few descriptions of how to change the "cartridge" (the actual interior mixer mechanism) for various models, but I had little joy trying to find specific instructions for this model, and was less than keen to play around blindly. A water leak or broken tap is the last thing I need, and I'd have a hard time explaining to my landlord how such a thing could have happened without my direct intervention.
Disliking the phone in general, I emailed Bristan's customer service directly:
I have a Bristan Matrix Mixer Tap with pop-up waste (see attached image) and no idea how to service it. The handle no longer moves "smoothly", which I attribute to a build-up of debris and/or limescale on the inside of the mechanism. I have been unable to find detailed instructions on how to disassemble, clean then re-assemble the tap.
Can you advise?
Experience tells me that companies tend not to respond to such specific inquiries, especially for models that do not appear to be sold any longer, when plumber-level documentation is already available on their website for similar units.
I knew that at the very least, having sent my message late on Friday, I'd have to wait until at least Monday to receive nothing back.
Come Monday, before 10am, imagine my surprise…
Good Morning Tom,
Thank you for your email.
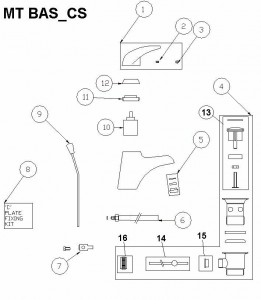
Please find attached an exploded spares diagram for your Matrix tap which I hope will assist you in disassembling your product. As you will see, there is a small grub screw located beneath the blue & red indice (which will prise out). This will be removed usually with an allan key and then the handle will lift away from the tap.
The shroud beneath the handle will unscrew to reveal the cartridge beneath.
Please do not hesitate to contact us should you require any further assistance.
Well, how about that! The key to the whole endeavour was the new certainty that the blue/red "indice" would "prise out"; I'd suspected this but didn't want to go stick screwdrivers in things unless I was sure.
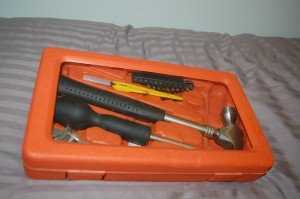
So now, armed with an IKEA "FIXA" toolkit (plus random Stanley knife I acquired somewhere along the way) and Bristan's diagram for reference and peace of mind, I was ready to go.
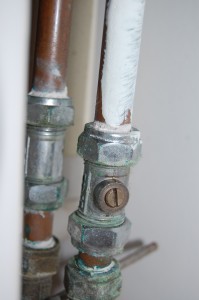
First thing's first, though; from my original web browsing I'd discovered the easiest way to safe the sink — isolate the water supply to the taps, leaving other supplies in the flat enabled so that I could still use them to clean individual components as I went along.
One half-turn of the screw on the hot water pipe then the same on the adjacent cold water pipe behind the sink is enough — when horizontal the water is cut-off, and when vertical it flows. This made it easy to discover which screw to turn, as I would have been uncomfortable turning any of them more than a few rotations during my guesswork for fear of springing a nice big leak in the pipework.
Checking that there were no evident leaks anywhere — I didn't want a nasty surprise when moving on to pulling various components out of the assembly — I prised out the "indice", which actually popped out quite easily with help from a strong fingernail, and found a tiny grub screw barely visible behind it as promised.
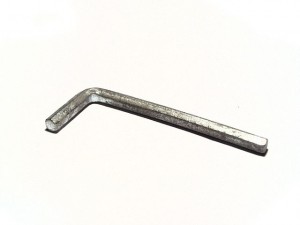
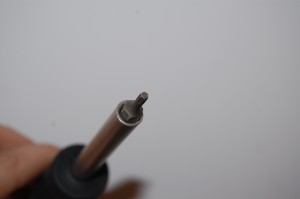
It was quite far behind the hole in the handle. I had been advised at this point to use an allan key, but my IKEA kit has screwdriver heads of various sizes with the same pattern, so I used the one labelled T15. T10 is a tighter fit, but I'd struggled to get initial traction with it through the tap head.
(Allan key image by Richard Wheeler (Zephyris) 2007.)
Once loose enough, the grub screw fell off inside the mechanism but, no foul; I figured I'd find it again later.
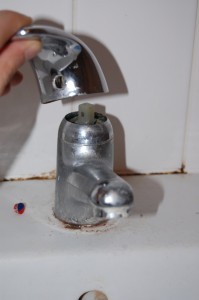
With this done, I set about finding a way to "lift out" the handle from the tap. I really didn't want to force it and found no obvious separation point, but a quick referral to Bristan's diagram showed me where it should have been, giving me the confidence to apply more force. Indeed, a firm vertical pull "clips" the handle off the base.
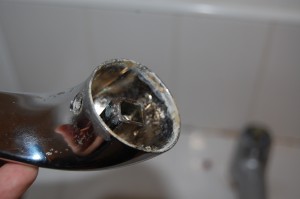
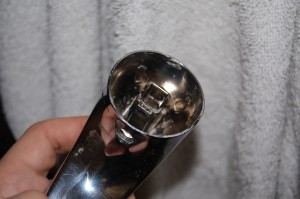
My first cleanable component! As expected, some water-related detritus had accumulated around the inside of the handle. There was actually less build-up here than I expected, so at this point I expected more cleaning to need doing, not least because I had read about people cleaning and even replacing mixer tap cartridges, setting a precedent for my expectations.
For now, though, I gave the inside and outside of the handle a good wipedown using a different sink and a j-cloth.
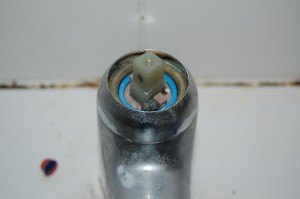
At this point the cuboid head of the cartridge was mostly exposed, and using my finger I could rotate it in the same manner that the handle does; it still felt stiff, but this could have been mostly attributable to the lack of leverage.
(I took this opportunity to reclaim the fallen grub screw, too.)
Again following the diagram, I unscrewed the "shroud" to get at the cartridge proper, using a rubber glove to get some traction.
At this point, though, I became stuck. Not physically. My kit didn't contain a spanner big enough to grip the top of the cartridge and, with it screwed in fairly firmly I couldn't remove it.
Slightly dejected, I began putting all the pieces back together with the intention of coming back another day with some extra tools. First the shroud, then the handle went back on; to replace the grub screw I placed it on the end of my T10 to keep it level as I pushed it through the hole in the handle, gently screwed it in a small way, then switched to the T15 to finish the job. Finally the "indice" got snapped back on.
To my surprise, I found that my work so far seemed to have loosened up the handle enough to effectively accomplish my goal!
With little apparent need for removing and cleaning underneath the actual cartridge, I took advantage of the isolated supply to thoroughly clean the exterior of the tap assembly, then turned the water back on. Job done.
Though I like to try things out myself, I am cautious when it comes to plumbing, and I wouldn't have managed this without Bristan's excellent customer service. It just goes to show what a difference that can make: the direct result is that Bristan will certainly be first on my list when shopping for bathroom fittings in the future.
